


By Koen Van Impe March 17, 2021
MISP Objects
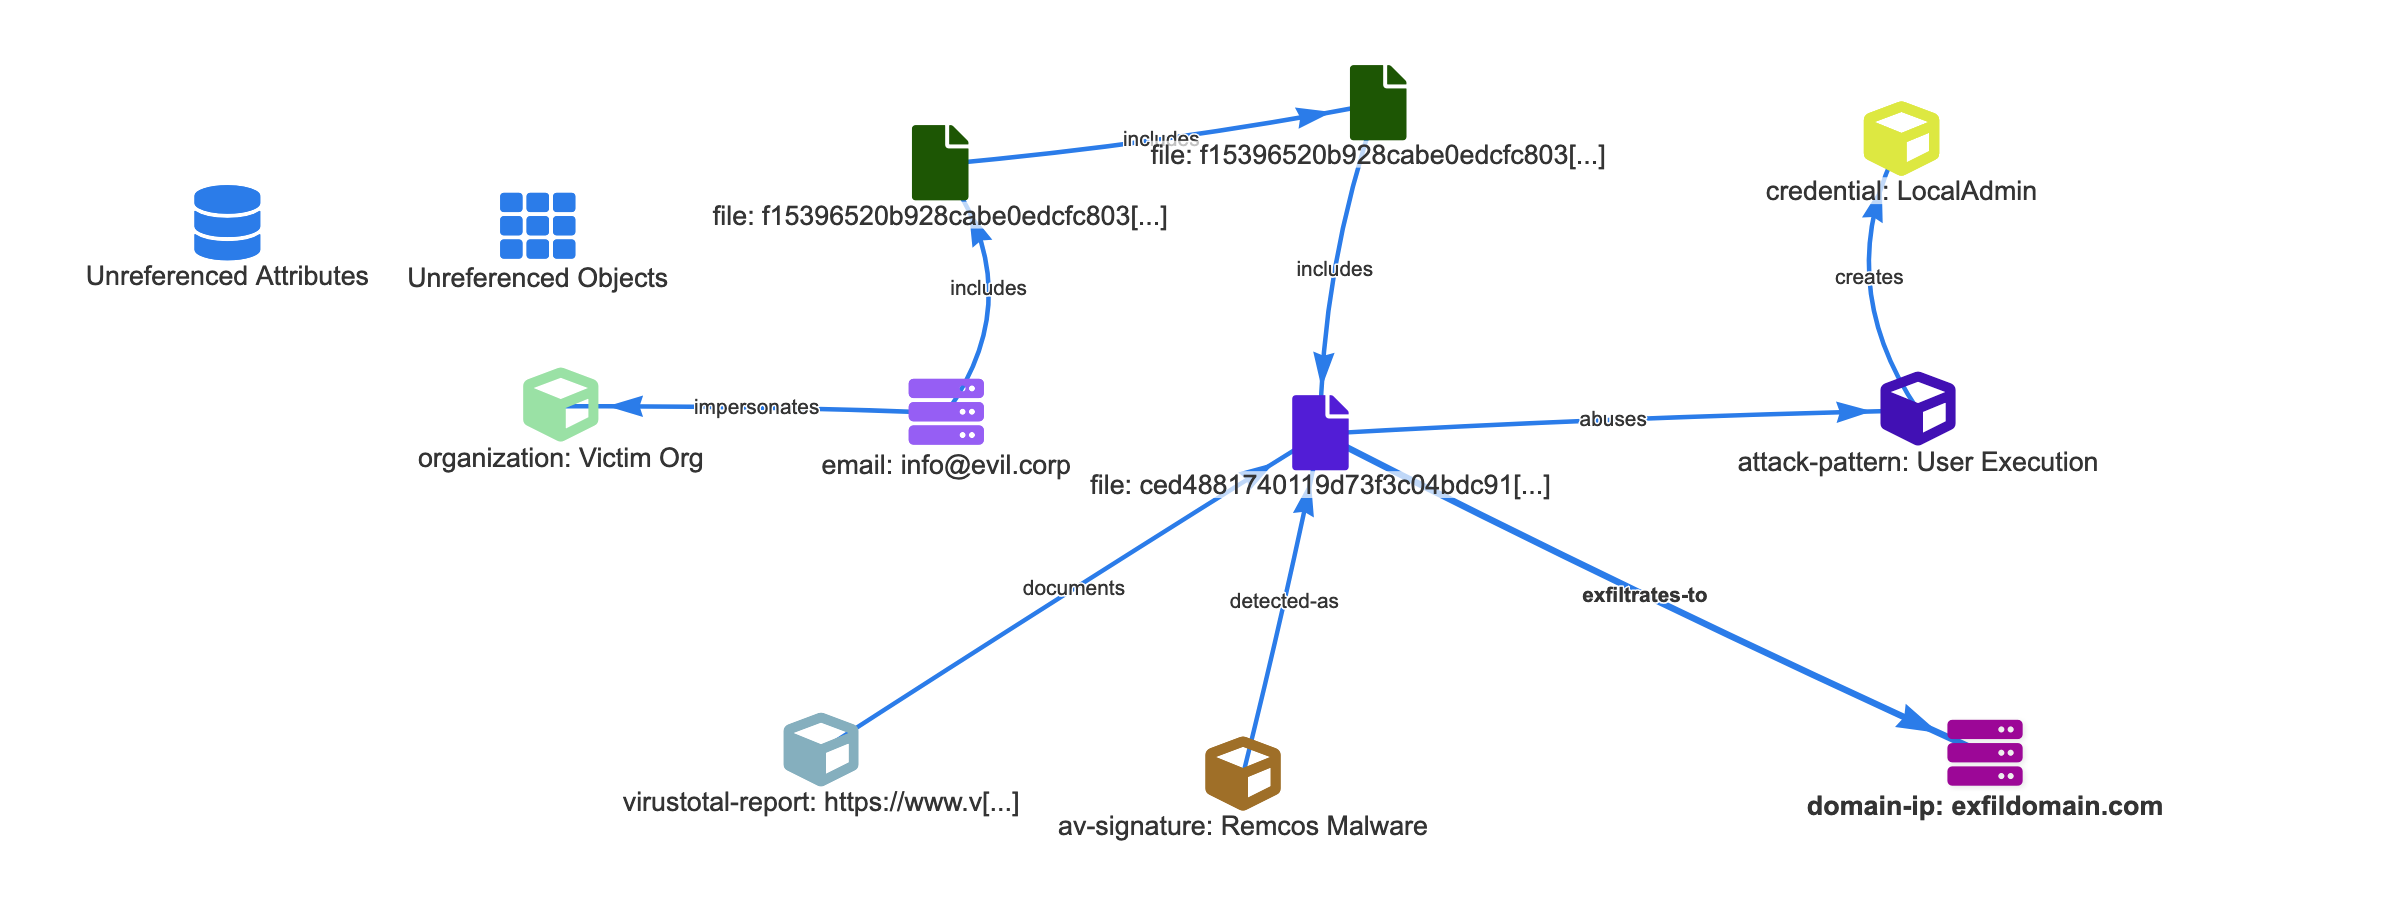
MISP objects are containers around contextually linked attributes. They support analysts in grouping related attributes and describing the relations that exist between the data points in a threat event. Combining these objects and relations is something that can then be used to represent the story of what is being told in the threat event.
MISP supports a large list of objects such as
- AV-signature: an antivirus detection signature
- Domain/IP: document a tuple domain, hostname and IP address
- File: describing a file with meta information
- Organization: an object to describe an organization
All these objects are available via the MISP-Objects Github repository and directly accessible within MISP. Despite the large list of already available objects it’s always possible that these do not fully address your need.
So how to add your own objects?
Concepts
First some basic concepts
- To maintain uniformity, objects are described in a MISP object template format. So in order to add an object, you essentially need to add an object template file.
- The MISP object template format uses JSON and is described in a standard format.
- An object template contains a header section with meta information and then a list of attributes.
- Relations between objects are not part of the object template.
MISP objects are stored in the file location /var/www/MISP/app/files/misp-objects/objects (provided MISP is installed in a default location). Each object is stored in a separate directory and described in a template file called definition.json. As an example,
- The object domain-ip is stored in the directory
/var/www/MISP/app/files/misp-objects/objects/domain-ip/ - This object is described in the file
definition.jsonstored in that directory
Demo
In this demo I’ll explain how to add your own custom MISP object and make it available in the MISP interface. The easiest approach is to start from an already existing template but in order to have a good understanding of the object template format file let’s start an object template from scratch.
The demo object that we’ll create covers an internal corporate asset.
Object template file
Valid JSON
An object template file needs to be a valid JSON file. If your template file is not valid JSON it will not be possible to use it within MISP. The error messages from MISP will not always indicate that there’s a problem with the JSON file format. The best advice is to use your editor to validate the JSON file or use an external resource such as JSONLint.
Directory and file
The first step in creating the new object is creating a new directory in the objects directory and then add an empty file in this directory. After creating this directory and file we need to make sure that the file is readable by the web user.
mkdir /var/www/MISP/app/files/misp-objects/objects/demo-template/
touch /var/www/MISP/app/files/misp-objects/objects/demo-template/definition.json
chown -R www-data:www-data /var/www/MISP/app/files/misp-objects/objects/demo-template/
Object template header
Now open the template definition file (definition.json) and add a header which will contain the meta information. This includes
- A unique ID (uuid). You can generate such an UUID online via UUIDGenerator or on the command line with
uuidgen. - A description and a name for your new object. These are human-readable strings describing the object.
- A version number which is a numeric incrementing version of the object template. Whenever you update the object template, you have to increment the version.
- A meta-category which represents the sub-category of objects that the object template belongs to. This meta-category is a string and is not tied to a fixed list. Example of meta-categories in the current objects include climate, file, financial, followthemoney, health, iot, misc, network and vulnerability.
Apart from his meta information, the object template file also contains the rules, or requirements that apply to this object. These rules describe which attributes need to be part of the object to have a valid object.
- Required, a JSON list with all the required attributes.
- requiredOneOf, a JSON list of attributes of which there needs to be at least one present.
To summarize this, the below section of the object template file describes our header. This concerns an object corporate-asset with two required attributes, asset-type and asset-id.
  "description": "Corporate asset",
  "meta-category": "misc",
  "name": "corporate-asset",
  "required": [
    "asset-type",
    "asset-id"
  ],
  "uuid": "1a99327a-bbe6-493d-97da-fce83965eccd",
  "version": 20210317
Object template attributes
Now that we’ve added our header, it’s time to add the list of attributes that we want to include in the object. These attributes are in a JSON list (called attributes) and are essentially a list of elements that under the hood reference MISP attributes.
How do you describe these individual attributes? Each attribute is referenced by an attribute name, which in turn contains a JSON list with these values
- A description which is the description of the given attribute in the context of the object.
- The misp-attribute to which this attribute can be mapped. Note that in a lot of circumstances you might just want to link to the MISP attribute ’text'.
Apart from these values, there are some optional, but still interesting, values to include.
- The ui-priority, a numeric value to provide a priority in the object template visualisation.
- An indication if you want to disable_correlation on the attribute.
- Whether you allow multiple instances of the attribute to be present.
- A list of predefined values_list from which the user has to choose.
If we now convert this in a practical example we can list the attributes of this object as follows
  "attributes": {
    "asset-type": {
      "description": "Type of asset",
      "disable_correlation": true,
      "misp-attribute": "text",
      "ui-priority": 3,
      "values_list": [
        "Server",
        "Workstation",
        "Printer",
        "Network",
        "Mobile",
        "Monitor"
      ]
    },
    "asset-id": {
      "description": "Asset identification",
      "disable_correlation": true,
      "misp-attribute": "target-machine",
      "ui-priority": 0
    },
    "business-unit": {
      "description": "Organizational business unit associated with the asset",
      "disable_correlation": true,
      "misp-attribute": "target-org",
      "ui-priority": 2
    },
    "text": {
      "description": "A description of the asset.",
      "disable_correlation": true,
      "misp-attribute": "text",
      "ui-priority": 1
    }
  }
In this example we have two attributes in the object model which are built on top of the MISP attribute type ’text’, one attribute on ’target-machine’ and one attribute on ’target-org’. The user is forced to do a selection from the supplied value list in asset-type.
Merge file
Now it’s a matter of merging the object template file header with the list of attributes, resulting in the below result
{
  "description": "Corporate asset",
  "meta-category": "misc",
  "name": "corporate-asset",
  "required": [
    "asset-type",
    "asset-id"
  ],
  "uuid": "1a99327a-bbe6-493d-97da-fce83965eccd",
  "version": 20210317,
  "attributes": {
    "asset-type": {
      "description": "Type of asset",
      "disable_correlation": true,
      "misp-attribute": "text",
      "ui-priority": 3,
      "values_list": [
        "Server",
        "Workstation",
        "Printer",
        "Network",
        "Mobile",
        "Monitor"
      ]
    },
    "asset-id": {
      "description": "Asset identification",
      "disable_correlation": true,
      "misp-attribute": "target-machine",
      "ui-priority": 0
    },
    "business-unit": {
      "description": "Organizational business unit associated with the asset",
      "disable_correlation": true,
      "misp-attribute": "target-org",
      "ui-priority": 2
    },
    "text": {
      "description": "A description of the asset.",
      "disable_correlation": true,
      "misp-attribute": "text",
      "ui-priority": 1
    }
  }
}
Update MISP
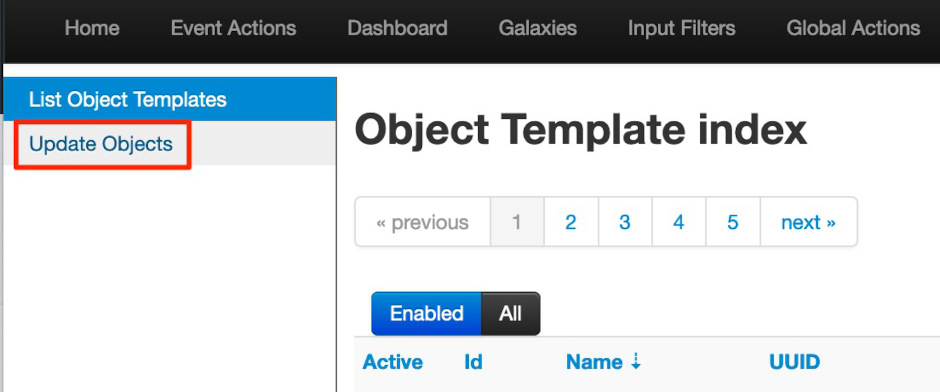
We’re not done yet. We have created the new object but MISP is not yet aware of this new file. To make the new object available in the MISP interface we have to update our object definitions. To do so go to Global Actions, List Object Templates and then on the left of the screen select Update objects. This instructs MISP to scan the local file system for changes and import the new files, provided they fit the correct format.
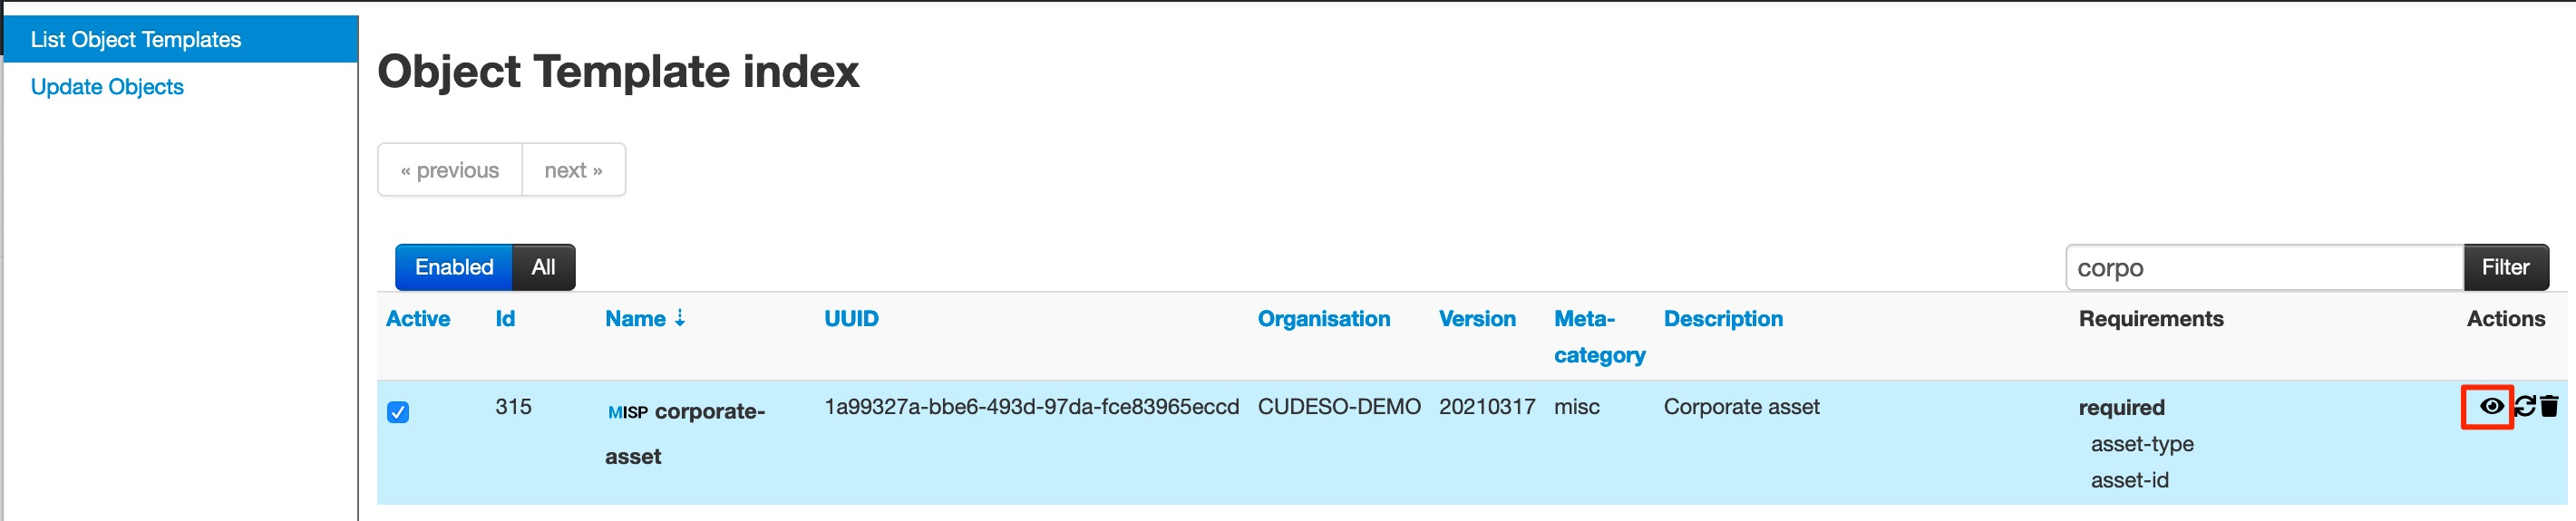
If the import was successful, you can also review the object template definition via the MISP user interface.
Relations
The MISP object model is open and allows user to use their own relationships. MISP provides a list of default relationships that can be used if you plan to share your events with other MISP communities. These relationships are defined in the file /var/www/MISP/app/files/misp-objects/relationships/definition.json
Validation
When you’re done with creating the object you can run validation scripts from within the MISP objects dirctory before doing a pull request.
./jq_all_the_things.sh
./validate_all.sh
If all looks good, you can do a pull request to make sure your object (and/or relation) is made available to the community.